The air still carries the faint, sweet scent of gunpowder and wonder from the recent Firework Season, a memory painted across the sky of the Firework Isles. Momo and I, we are adrift in this aftermath. The echo of that bewildering explosion in the market haunts the cobblestones, and Opera’s absence is a silent note in every melody we hear. We run, our footsteps a frantic rhythm against the island's quiet pulse, chasing whispers and shadows, hoping to stitch the torn fabric of this mystery back together. Every clue is a fragile thread, leading us deeper into the heart of the isles, toward a confrontation shrouded in gloom.
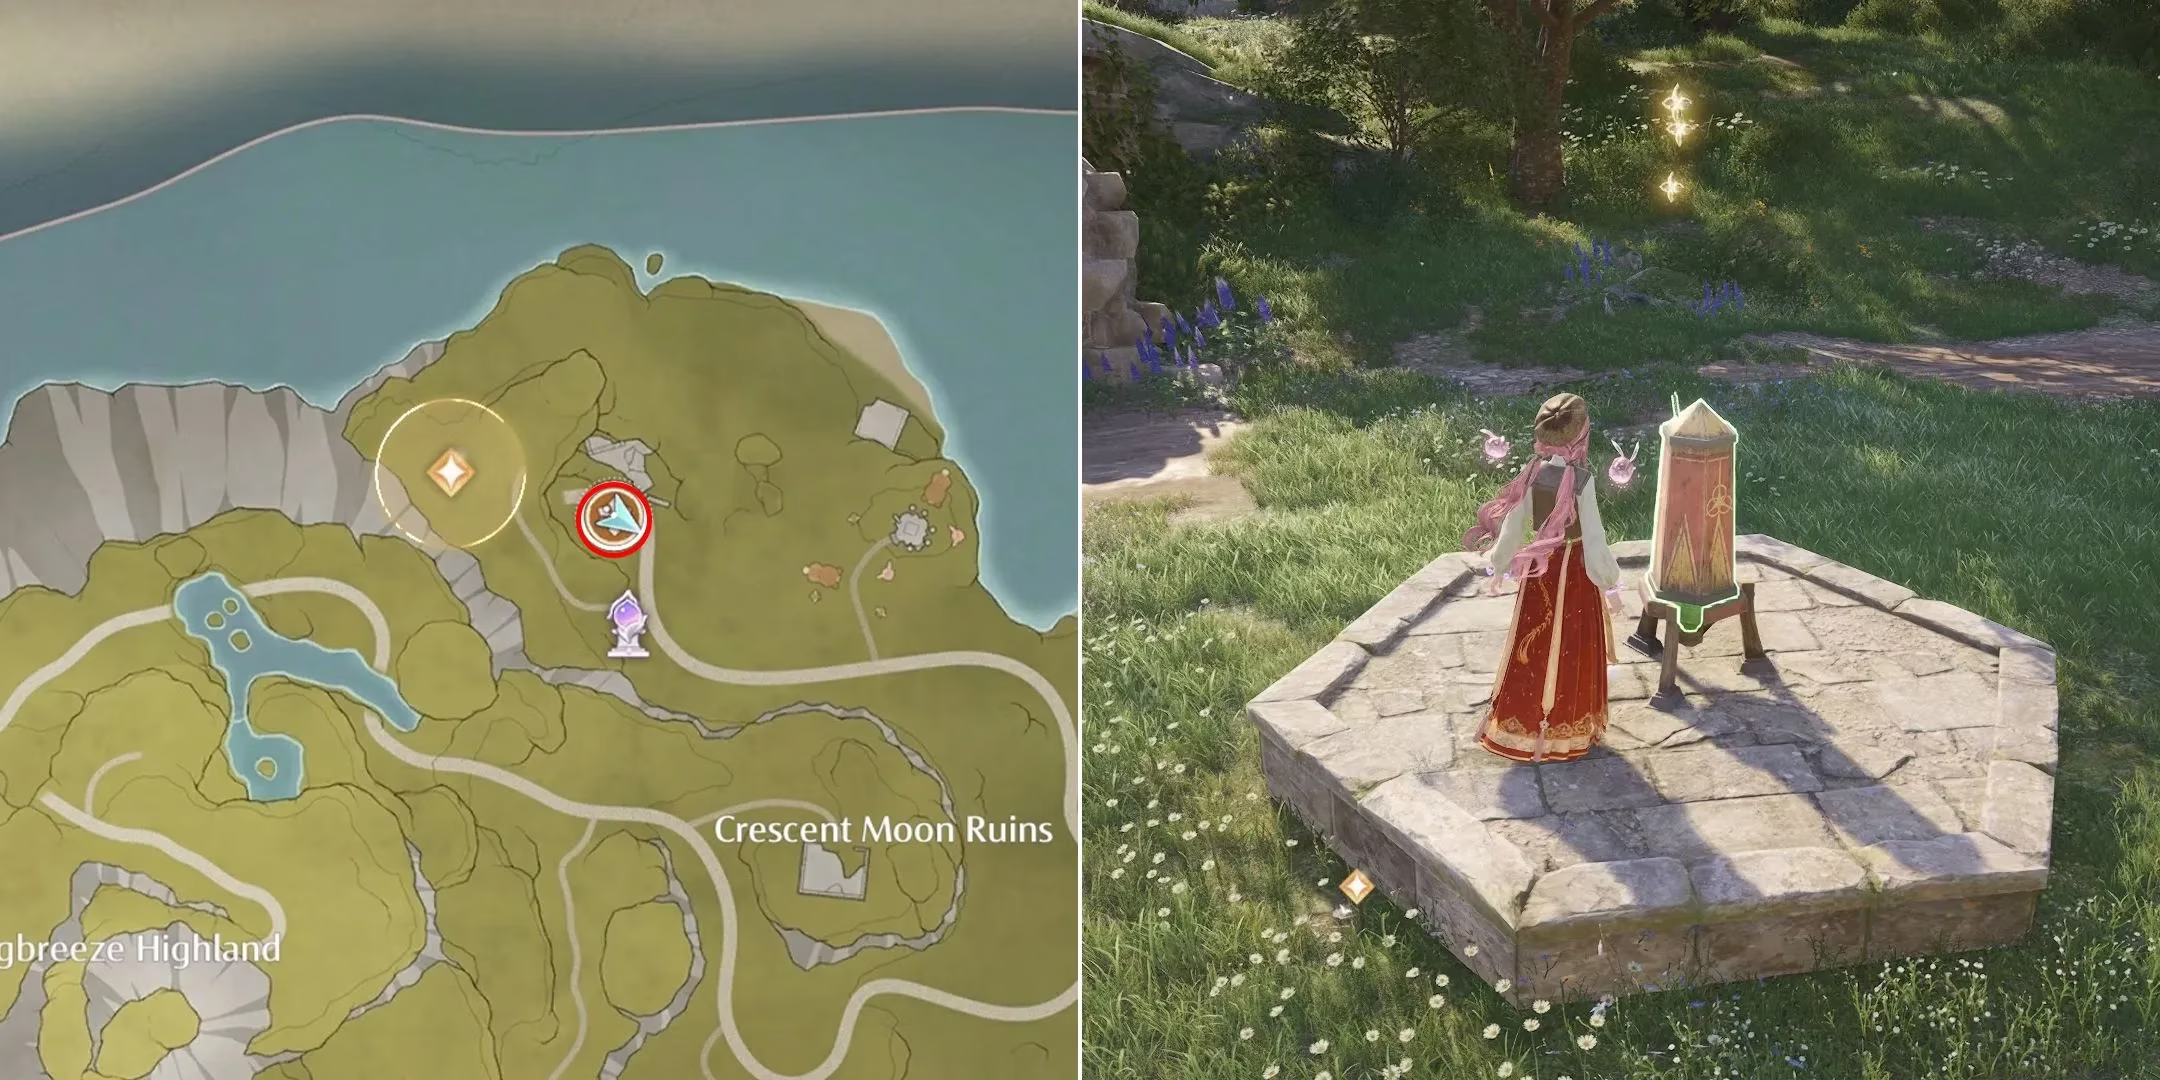
Our search eventually led us northwest of the Crescent Moon Ruins, to a place where the light seemed hesitant to tread—the sealed mouth of the Gloomy Cavern. The path there was not a gentle stroll, but a necessary battle. Esselings, those manifestations of lingering gloom, barred our way. With a deep breath and a focus on my styling energy, I faced them. Each clash was a burst of light against shadow, a cleansing of the path so we could proceed. And then, there it was: the cavern gate, cold and imposing, sealed shut by ancient magic. Beside it, a silent sentinel—a stone slab etched with a map of the isles itself, three points upon it glowing with the promise of fireworks.
The map was not just a guide; it was a key. To open the gate, we needed to answer its call with light. Three marked locations required a fireworks display, a symphony of sparks to unlock the silence. But I lacked the tool. The solution came with the Fireworks Training: Part 1 quest. For a mere 10,000 Bling from the Heart of Infinity, I claimed the Fiery Glow outfit—not just a garment, but a conduit for celebration, an ability woven into silk and spark. With it, I became the maestro of this required spectacle.
The First Spark: A Guardian's Salute
The journey began right at the cavern's threshold. The first launch site was almost a taunt, directly across from the sealed entrance. A simple approach, a touch of the Fiery Glow, and the night erupted. A chrysanthemum of fire bloomed overhead, its tendrils of light not fading into nothingness, but arcing purposefully through the air, drawn like a comet toward the cavern gate. It was a direct conversation, a first word spoken in a language of light.
The Second Spark: Echoes in the Ruins
For the second, we traveled to the heart of the Crescent Moon Ruins. Fast travel brought us to the Crescent Shaol Warp Spire, and from there, we ran west. The land told a story of fallen grandeur. We followed a worn dirt path north, until it curved decisively east. There, amidst the silent stones, gloom had taken root again. More Esselings awaited, guardians of this forgotten launch site. After purifying them with style and resolve, I stood before the second firework.
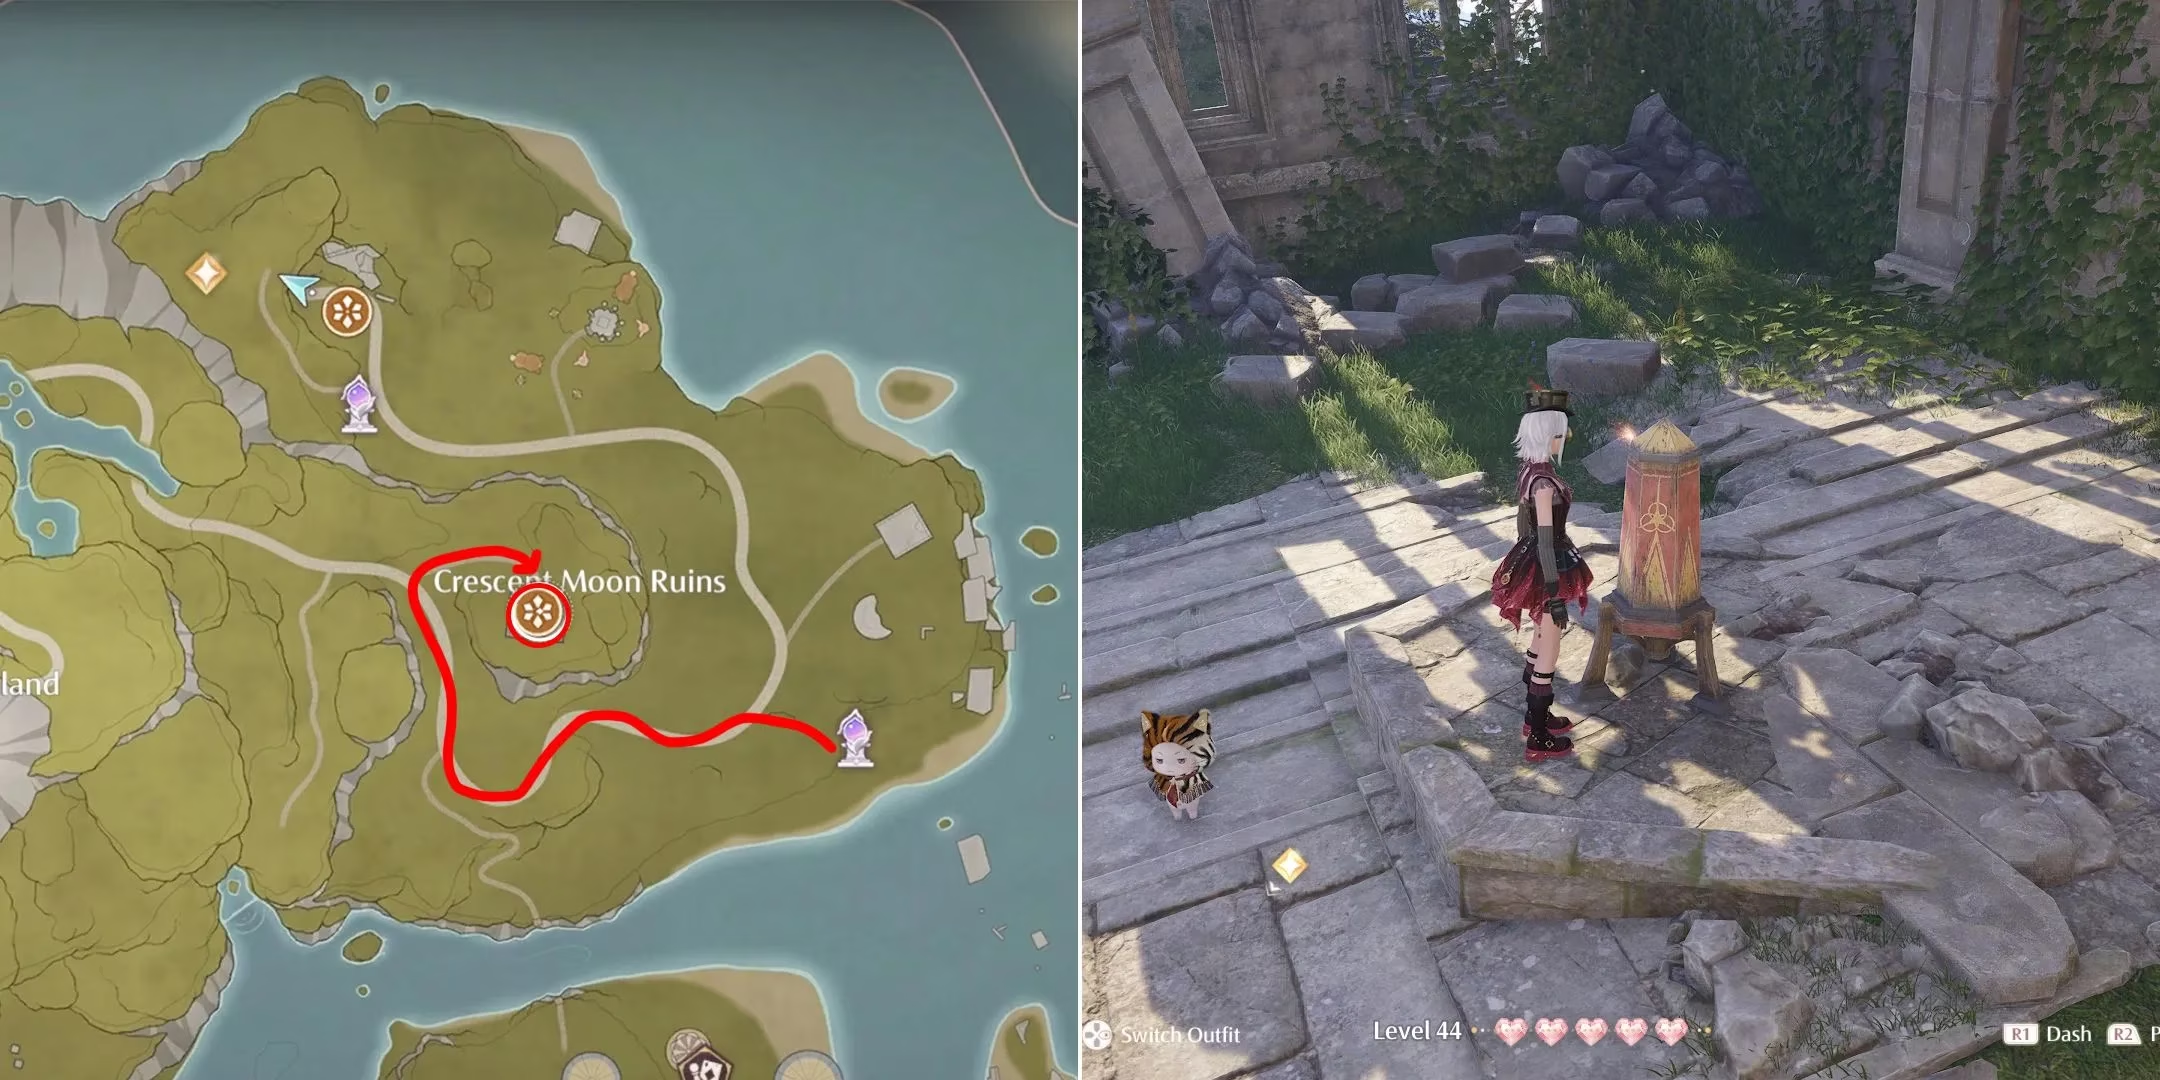
The ignition was a moment of profound contrast. The ancient, still ruins were suddenly alive with the crackling, colorful soul of the present. This firework’s journey skyward felt like a memory awakening, its path back to the cavern a bridge across time.
The Final Spark: Ascent from the Foothills
The last location demanded an ascent. We headed to the Songbreeze Highland Foothills and turned our faces south, toward the whispering danger of the Flaming Forest. The air grew warmer, charged with a different kind of energy. Here, the enemies were fiercer, as if defending the final key. With one last concerted effort, we cleared the area. Standing before the third and final launch site, I felt the weight of the quest. This was the concluding note.
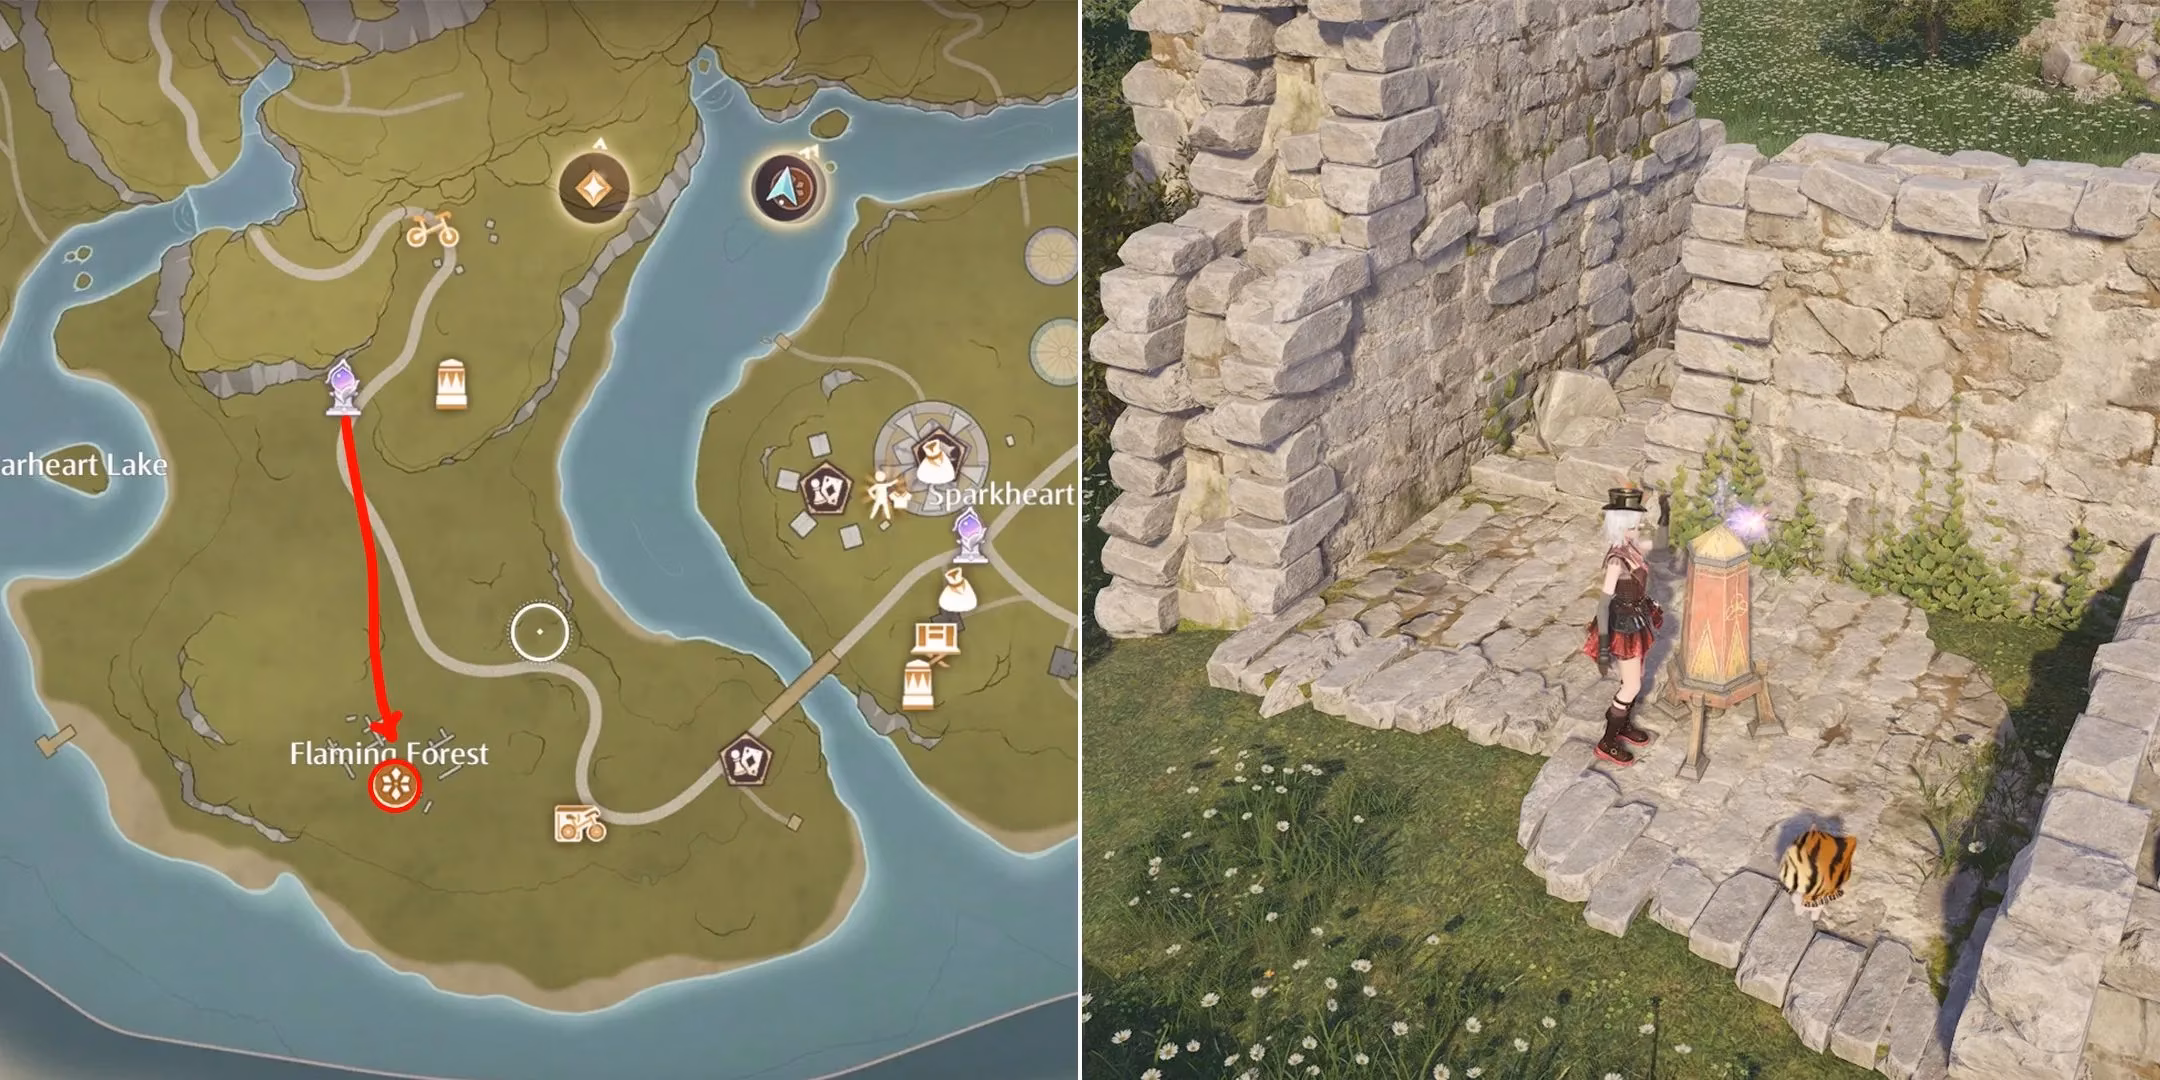
I activated the Fiery Glow. The finale soared—a brilliant, conclusive burst that painted the sky with triumph. With its light streaking toward the distant cavern, the triad was complete. The silent call of the stone map had been answered in full.
Confrontation in the Gloom
We returned to the Gloomy Cavern. The air was different now, humming with released energy. The great gate, once sealed, stood open, inviting us into the darkness. Inside, the cavern was a treasure trove of respite. Three chests awaited, their contents a glittering reward for the journey:
| Chest | Reward |
|---|---|
| First Chest | A generous cache of Diamonds |
| Second Chest | More Diamonds and styling materials |
| Third Chest | A final Diamond prize and rare enhancement items |
But the treasure was merely a prelude. Venturing deeper, the air grew thick and cold. Then, we faced it—the source of the gloom, the Balloon of Darkness. This was the true culmination of Showdown! The Gloomy Cavern! This battle was more than combat; it was a styling exorcism, a final, dazzling burst of light to dispel the concentrated shadow. With every strategic outfit change and ability unleashed, we chipped away at its form until, with a silent pop, it was gone, leaving only calm in its wake.
As the last echoes of the battle faded, I felt a profound completion. This quest, a vital thread in the grand tapestry of Chapter 1: The Wonderful Journey, was over. We had not just opened a cave; we had woven light into the map of the isles, answered a riddle written in stone, and faced the darkness with style. The mystery of Opera and the market explosion still looms, but for now, in the quiet of the unlocked cavern, there is only the satisfying echo of sparks well spent and a path forward, slightly brighter than before. ✨
Comments